MOTHER EARTH NEWS FAIR
 Visit us at Mother Earth News Fair
| • |
Premier's booth #151
Seven Springs, PA
September 20-22, 2013 |
| • |
Premier's booth #172
Lawrence, KS
October 12-13, 2013 |
CANNING RECIPES
Zesty Salsa
| • |
10 cups chopped, seeded, peeled, cored tomatoes (about 6 pounds) |
| • |
5 cups chopped and seeded sweet peppers (about 2 pounds) |
| • |
5 cups chopped onions (about 1-1/2 pound) |
| • |
2-1/2 cups chopped and seeded hot peppers—about 1 pound (Cajun bells taste superb but kung pao, habanero, jalapeno and chilies in all combinations also please.) |
| • |
1-1/4 cup apple cider vinegar |
| • |
3 cloves of garlic, minced |
| • |
2 tablespoons cilantro (If you're not a fan of cilantro, use celery; one entire stalk with leaves should work.) |
| • |
3 teaspoons canning salt |
Combine all ingredients in a large sauce pan. Bring mixture to a boil. Reduce heat and simmer 10 minutes. Ladle hot salsa into hot jars, leaving 1/4 inch headspace. Adjust 2-piece caps and lids. Process 15 minutes in a boiling water bath. Yield about 6 pints.
Note: When dealing with hot peppers, wear rubber gloves to prevent hands from being burned.
Freezer Pickles
| • |
4 cups cucumbers, sliced 1/4" |
| • |
2 cups sliced onions (I use sweet onions) |
| • |
2 tsp canning salt |
| • |
3 Tbs water |
Combine vegetables, salt and water in a large, nonreactive bowl (stainless steel or glass) and let soak for 1 hour. Drain, but do not rinse.
Add:
| • |
3/4 cup sugar |
| • |
1/2 cup white vinegar |
| • |
1-2 tsps dill seed |
Let sit at room temperature, stir occasionally, until all the sugar has dissolved and the liquid covers the vegetables. Freeze, or will keep refrigerated for up to two weeks.
HOW-TO NETTING VIDEO

View our detailed "how-to" properly store netting video above.
Would you like printed netting installation instructions?
Contact us, download instructions from our website or watch our video on how-to install electric netting.
NETTING TIPS
Tips for taking down and storing netting
What to do:
| • |
Moving (or removing) the net—Disconnect netting from energizer. Then walk along fence, progressively removing the posts for the soil and holding them in your hand in a tidy bundle. This allows the netting to fold together into 6-foot-long pleats as it drags along behind you. To keep the bundle of posts together, rest the tops against your belt or hip as you walk. Remove twigs and trash from the net as you fold it up. This will save time later when you reinstall the net. For PermaNet, this job is easier with 2 people. |
| • |
Rolling up the net—After the length of netting is folded up, pick up posts as a group and shake the net a bit. This allows the folded pleats to straighten themselves. Then lay netting on the ground and roll up the folds. Start with folded netting at end without posts and roll toward the posts. This will produce a roll much like it began—with all the posts on outside and the folds of net rolled up inside. |
| • |
Tying up a roll—Firmly tie the roll using the 2 tie strings. The roll of netting doesn’t have to be as tight as when new, but it needs to be tight enough to be easily carried or stored. |
| • |
If horizontal wires are broken, fix them before storing:
| 1. |
Disconnect from power source. |
| 2. |
Cut out damaged portion of the horizontal wire with a pair of scissors. |
| 3. |
Measure out an appropriate amount of replacement conductive or nonconductive material. |
| 4. |
Tie replacement material to one side of the break with a square knot. If possible, twist together the metal filaments of original material and splicing material before making the knot. |
| 5. |
Repeat the twisting, tying and knot step on the remaining side of the break. |
| 6. |
Place a brass ferrule over each of the square knots and clamp together with a pair of pliers. |
|
What NOT to do:
| • |
Trying to roll up the fence like wallpaper or a carpet instead of folding it up with the posts. Result: A tedious chore that takes forever. People who try to “roll instead of fold” quickly become aggravated with netting. |
| • |
Storing rolled-up fence on the ground near stored feed in a barn with rats and mice present. Result: Rodents gleefully respond to your care and concern for them in providing an ideal nest. They chew into the rolls, make themselves at home and severely damage the net. Instead, store netting far away from rodents and grain, or hang the roll off the ground on nails driven into a wall. |
Also see our how-to netting video above.
|
 |
|
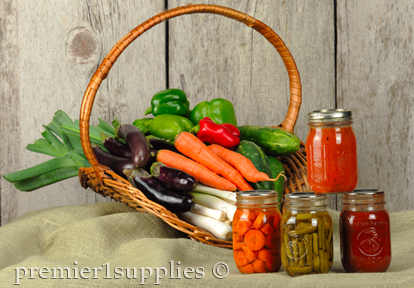
Excess produce? Can it! The produce in the basket (eggplant, leeks, carrots, peppers and cucumbers) were all grown in Premier's garden. Canned goods were provided by Premier staff members. As always, remember to wash your vegetable before consuming or canning.
Save the surplus—from your garden
Folks that enjoy taking produce from gardens, vineyards and orchards are transforming them into an assortment of pickled, preserved, dried and frozen foods to last into next spring.
Adrian (Premier's gardener/shepherd) has produced bushel after bushel of green and purple beans, a side benefit of planting legumes to fix nitrogen in the soil. The vast quantities produced have outpaced the Premier consumption rate, which is no small feat. So a few Premier folks have canned jar after jar of these delicious beans.
Tomatoes, peppers, onions and cucumbers have found themselves chopped, sliced, pureed and thrown into jars with one another. Salsas have been very popular, as well as various types of pickles. For a crispy and fresh pickle recipe, try the freezer/refrigerator pickles to the left.
For an interesting take on preservation, check out lacto fermentation, which uses a salt brine and lactic-acid-producing bacteria to preserve foods without heat. Makes for a nice crunchy food.
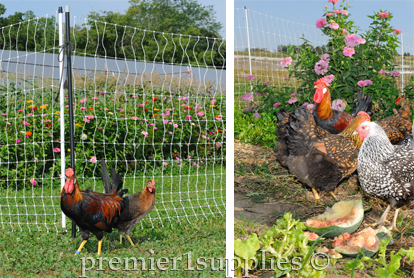
Left photo: While the garden is producing, make sure to fence out any free ranging chickens.
Right photo: When the garden is done for the season, it's all right to let them in to clean up.
This summer we used electrified netting to protect our garden from pests (including chickens). Now that our garden season is coming to an end (the drought has helped—unfortunately) we're working on getting our chickens started on clean up duty. Discarded veggies and plant stalks will soon fall prey to the pecking and scratching of the birds. Next month our Poultry Newsletter will cover more on composting with chickens.
For information on using and storing netting, check out our video and information to the left.
Want to learn more?
Click here to read our archived Garden Newsletters.
EXTENSION INFORMATION
Canning: Pickles
By Iowa State University, Extension and Outreach
Pickling is preserving a food with acid and salt. The key to safe pickling is making sure that the acid is high enough to kill any microorganism that can lead to spoilage and illness. There are four types of pickles: fermented or brined, quick pack, fruit, and relishes.
Ingredients
All vegetables, fruits, spices, and herbs used in pickle products should be fresh and of high quality. Pickling will not improve poor quality products.
Cucumbers
Plant a variety of cucumbers intended for pickling. Immature salad or slicing cucumbers do not make good quality pickles. Burpless cucumbers are not recommended for pickles because they have a tough skin that may inhibit brine absorption and also contain enzymes that could cause pickles to soften. If you purchase cucumbers, make sure they have not been waxed. Although the wax used on cucumbers is completely safe, it may inhibit penetration of the brine and pickling solutions.
Pickle quality is affected by the time lapse between harvesting and pickling. Plan to pickle fruits or vegetables within 24 hours after harvesting. Soil can harbor bacteria that can cause spoilage or softening, so be sure vegetables are washed well, especially around the stem. Blossoms contain enzymes that can cause softening, so always remove a 1⁄16-inch slice from the blossom end of the vegetable.
Vinegar
Cider vinegar or white distilled vinegar can be used in pickle recipes. Cider vinegar tastes more mellow, but may darken white or light-colored fruits and vegetables. White distilled vinegar has a sharper taste and should be used when a light color is important.
Do not use homemade vinegar. The level of acidity is important to both the flavor and safety of the product. Pickles may spoil if the vinegar contains less than 4 percent acetic acid. Never alter the amount of vinegar or water. All USDA tested pickle recipes are based on the use of vinegar with 4 to 6 percent acetic acid. This is the range of acidity of most high quality, commercially bottled vinegar.
Some fermented pickle products, like sauerkraut, do not require vinegar or acetic acid because of lactic acid produced during brining and fermentation. In certain recipes for genuine dill pickles, some vinegar is added initially and lactic acid is formed during the fermentation process.
Salt
Use only canning or pickling salt. Table salt is pure but contains iodine and anti-caking agents that might cause pickles to darken or the liquid to become cloudy. Do not use flaked salt or rock salt. Reduced sodium salt may be used in quick pickle recipes but the pickles will have a different flavor. Reduced sodium salt should not be used in fermented pickle recipes.
Always use the amount and type of salt specified. Salt, as used in brining, functions as a preservative. The brine draws moisture and natural sugars from the vegetable. Lactic acid is then produced, which prevents spoiling.
Water
Use soft water for best results. Extremely hard water can interfere with curing and cause discoloration of pickles, particularly if the water has a high iron content. Some types of hard water can be softened by the following method. Boil water for 15 minutes, remove the scum, cover and let the water stand 24 hours. When the sediment has settled to the bottom, pour off the water without disturbing the sediment. Discard sediment and use water. Distilled or bottled water can be used for pickles also, but may be expensive.
Sugar
Use white granulated sugar unless otherwise specified. Brown sugar may darken the liquid and change the flavor slightly. If you plan to use a nonnutritive sweetener, use tested recipes that accompany these products.
Spices and Herbs
Spices and herbs lose quality rapidly after opening; for best flavor always buy fresh seasonings yearly.
Use clean, fresh, insect-free heads of dill. Avoid overmature, dry, brown dill. Fresh dill is preferred because it gives better flavor, but 1 to 3 teaspoons dill seed can be substituted for one head fresh dill.
Lime
Using quality ingredients and current pickling methods eliminates the need for crisping or coloring ingredients. Calcium increases the firmness of both pickled and fermented cucumber; alum only improves the firmness of fermented cucumbers. Pickling lime (calcium hydroxide) is a common calcium source added to firm pickles. DO NOT use quick lime or agriculture lime as they are unsafe for human consumption. Food-grade lime can be purchased at most supermarkets and drugstores. Lime should be used only as a soak solution, not in the processing liquid. The absorbed lime will increase to the pH of the cucumbers so they must be rinsed thoroughly before processing according to the tested recipe.
Combine 1 cup pickling lime with ½ cup canning or pickling salt and 1 gallon water in a 2- or 3-gallon crock or enameled container. Avoid inhaling lime dust when mixing solution. Soak cucumbers in lime water for 12 to 24 hours. To rinse, drain the lime water solution, then put cucumbers in a large clean container and soak in fresh, cold water for 1 hour. Repeat rinsing and soaking steps two more times, using fresh, cold water each time. Drain well. Store any leftover pickling lime in a clean, labeled glass jar with a tight fitting lid to keep the powder dry and free-flowing.
Equipment
Use unchipped enamelware, stainless steel, aluminum, or glass pots for heating pickling liquids. Do not use copper, brass, iron, or galvanized pans or utensils. These metals can react with acids or salts to produce undesirable changes in color or flavor, or even form toxic compounds.
Genuine dill pickles and sauerkraut are traditionally fermented in stoneware crocks but can be brined in large containers made of glass, unchipped enamelware, or foodgrade plastic. Large plastic pails can be purchased in home winemaking shops or at restaurant supply stores. Do not use plastic wastebaskets or garbage cans or copper, iron, or galvanized metal containers.
Read More »
PRESERVING THE TASTE OF SUMMER
Canning Season
Whether you're a beginner or an experienced canner, you'll find a number of helpful articles about canning on the National Center for Home Food Preservation site.
Interested in participating in Iowa's statewide food preservation program?
Check out Preserve the Taste of Summer.
|
|

