
Rotational grazing can be simply explained as moving livestock between pastures (often called paddocks) every set number of days or as needed. The benefits of rotational grazing are many. But, how do you get started? In this issue we explore three practical paddock configurations.
Premier’s electric netting is well-suited for rotational grazing—it’s quick to install, durable and adaptable to dips and curves in difficult terrain. While the flock or herd is grazing a paddock, temporary fence for a second is installed. The animals are moved from the old paddock to the new when forage in the first paddock is expended. The fence from the original paddock is taken down and reset, making a third paddock for grazing. This process is repeated for the entirety of the pasture.
Three different ways to rotationally graze…
A common question from those new to electric netting is, “How and where should I position the netting so it’s easy to move both the fence and the livestock it protects?” In response, we’ve organized three grazing options:
- A two-net system with multiple paddocks
- A three-net system with multiple paddocks
- A seven-net system for larger flocks
A two-net system with multiple paddocks (energizer doesn’t need to be moved)
This simple two-roll set-up creates four equally sized paddocks. The key is to install net B so its ends meet at the end of net A, whose ends meet at the energizer (center above). Open up both nets to transfer animals. Take down the original paddock and use that net to set up the next (and so on). Fence line would measure 40’x40’ for 1,600 square feet of grazing per paddock or 6,400 square feet for the whole system.
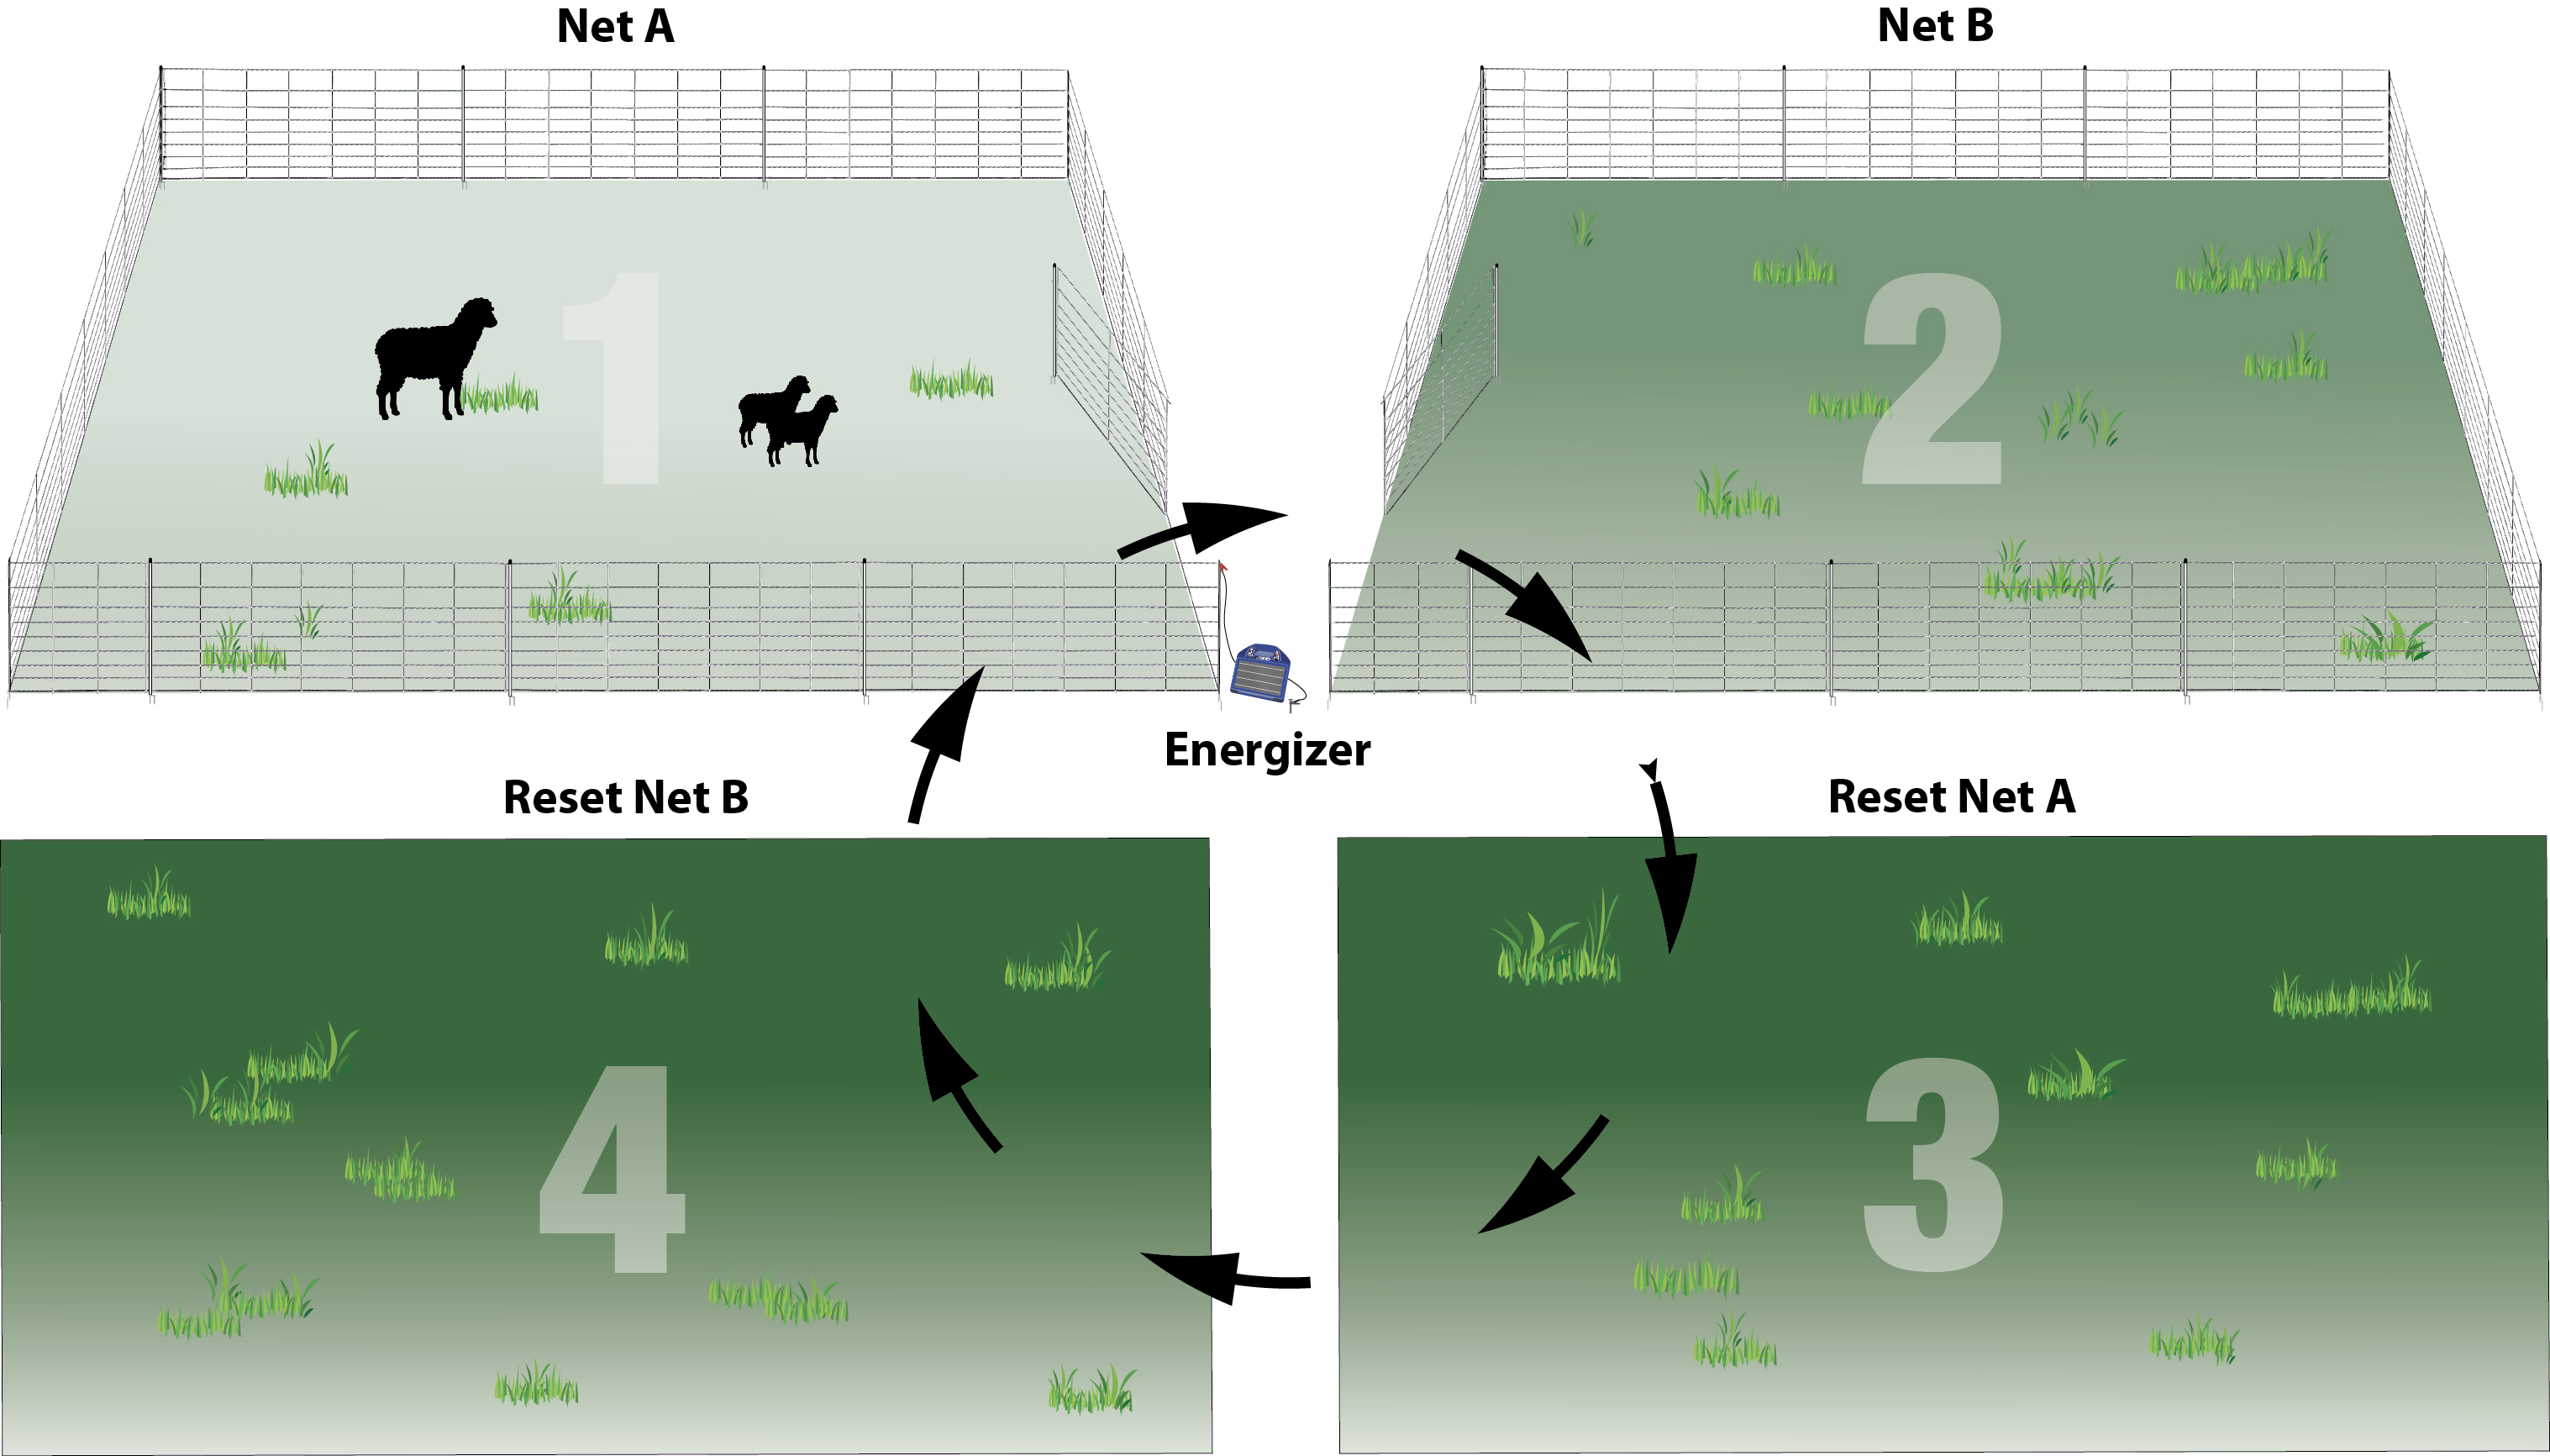 This design focuses on moving your netting so the energizer does not have to moved. This saves time and effort. You don’t need to pull out and pound in the ground rod with each move.
A three-net system with multiple paddocks (rarely move the energizer)
Install your temporary netting as a subdivision fence between semi-permanent or permanent fence. The nets in this system will leapfrog one another. Two nets will be used to form an enclosure (A and B), while a 3rd (C) is set up ahead forming the next paddock to graze. When the flock/herd is moved to new grazing, net A is taken down and moved ahead to form the next paddock.
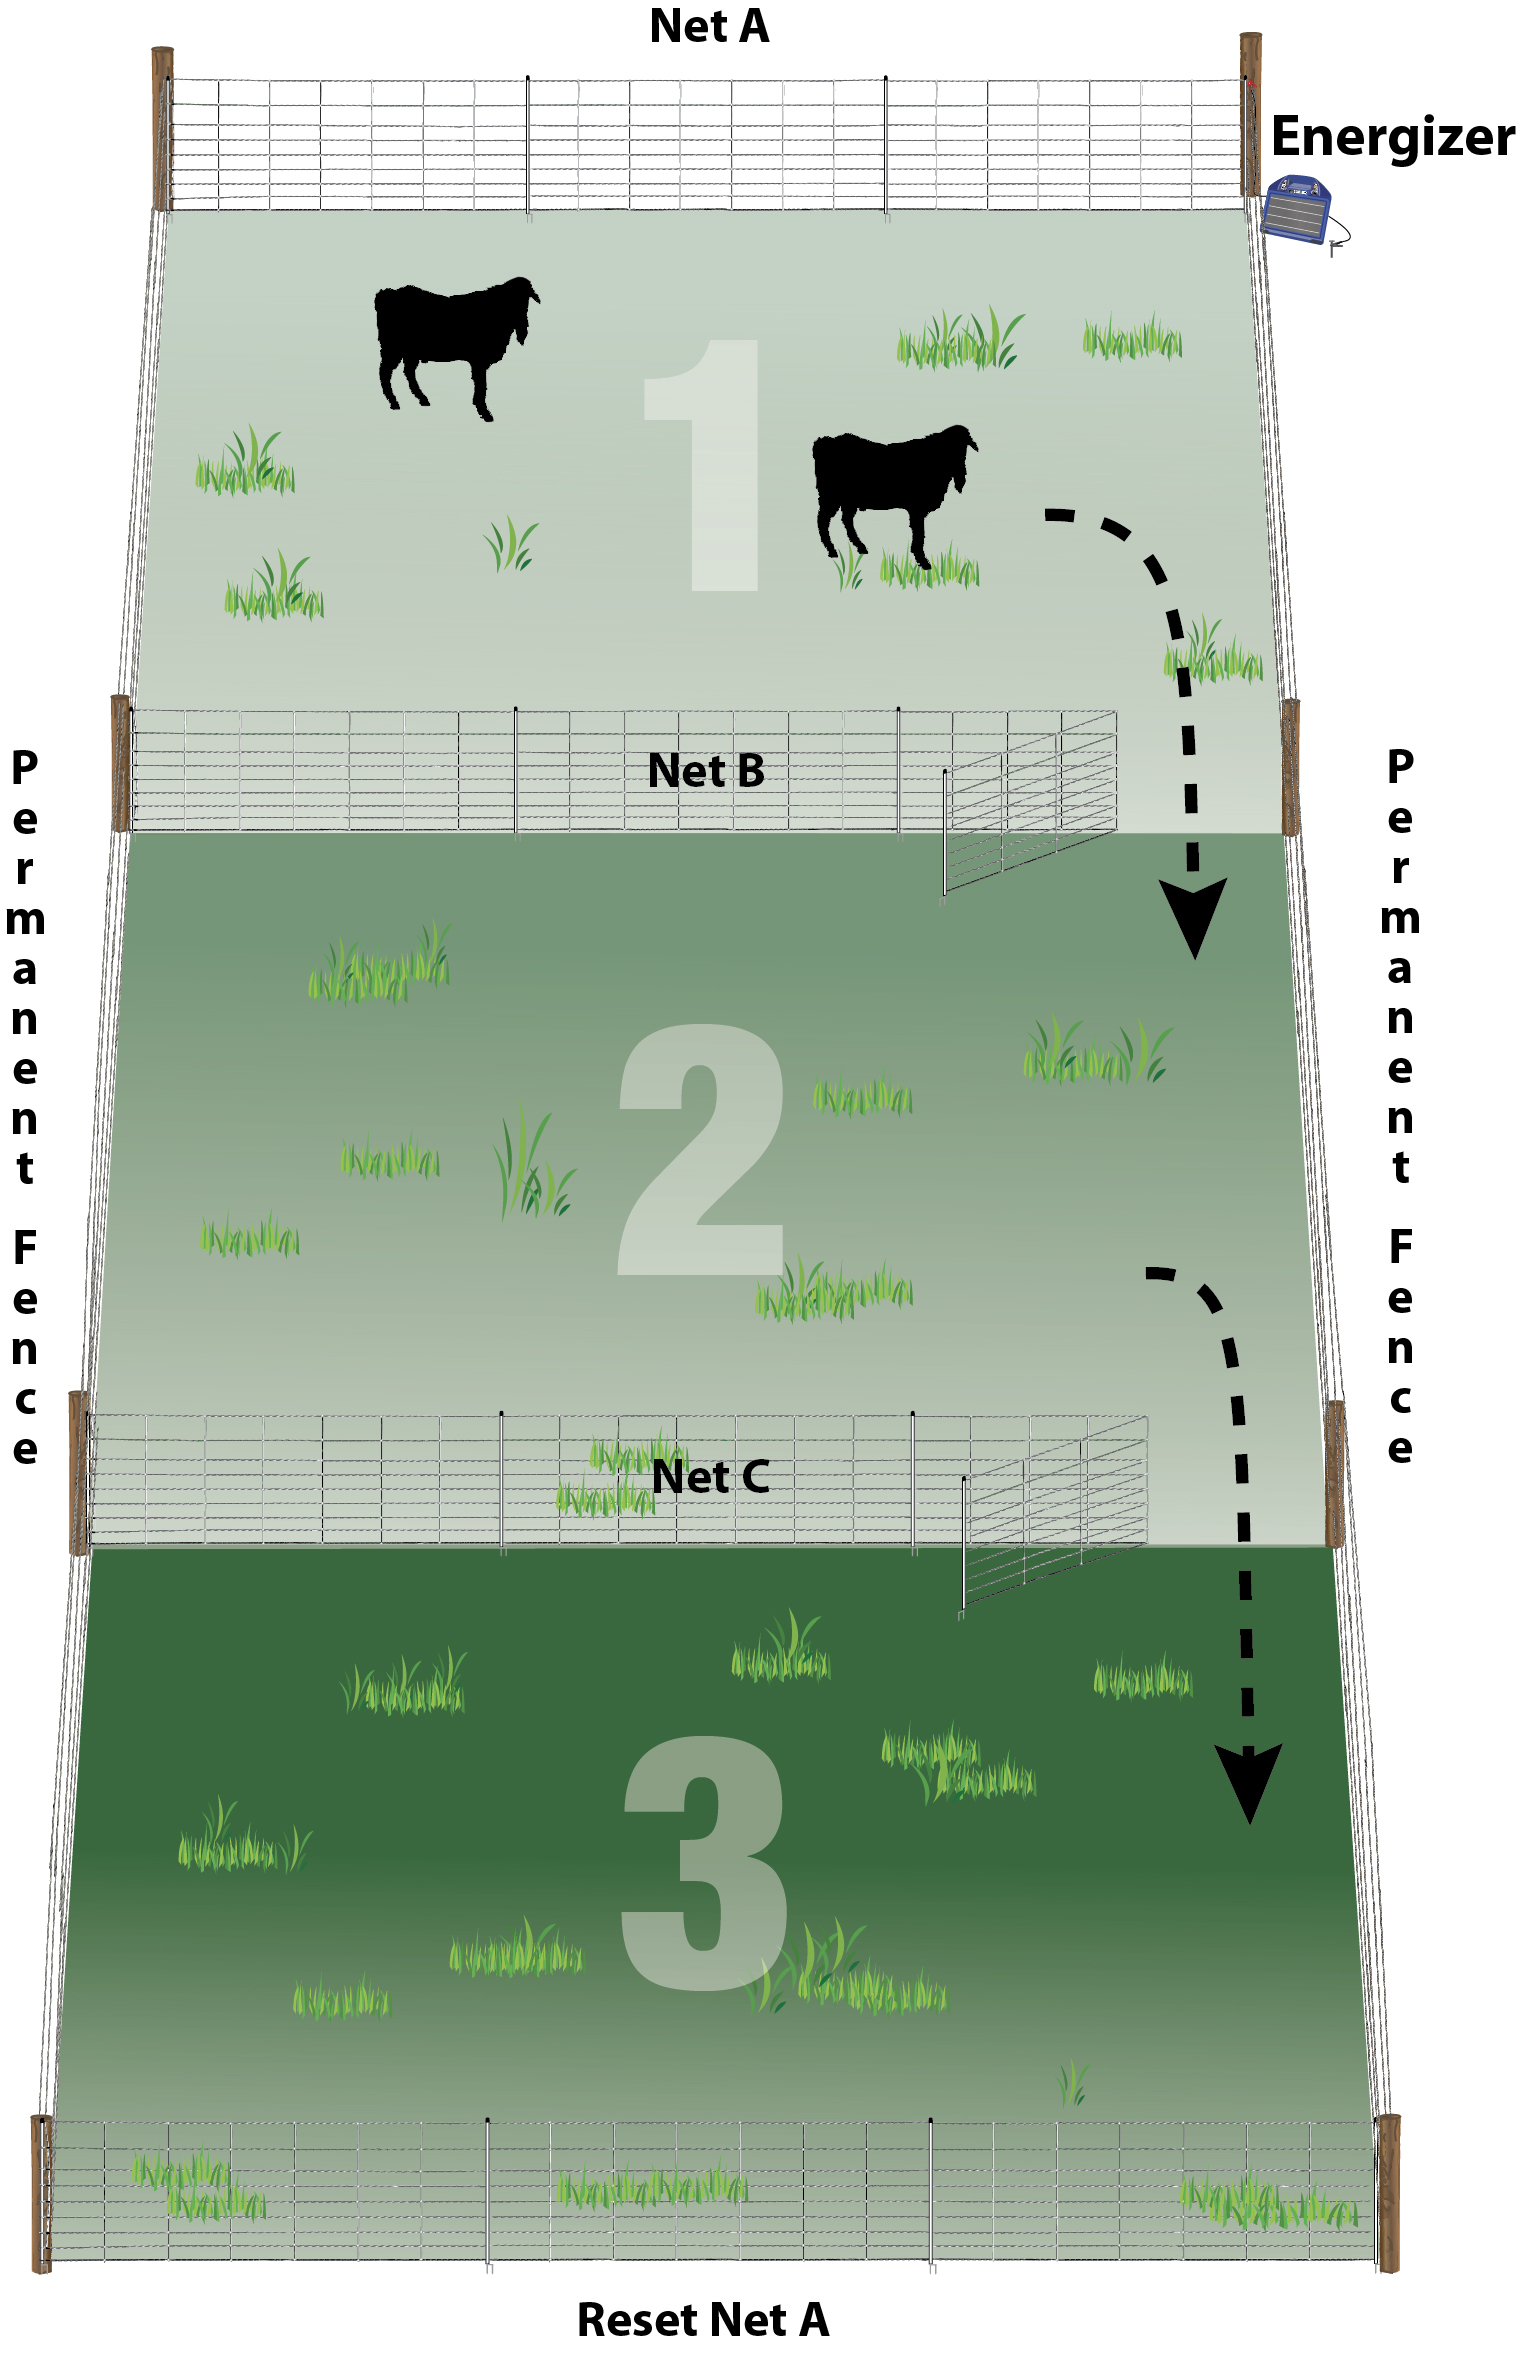 This design assumes permanent fencing for two sides, with netting running in-between. Square footage will depend on the length of nets and the distance between them. If distance between the permanent fences is more than 164’, additional nets may be required.
A seven-net system for larger flocks (occasionally move the energizer)
Use four nets (A-D) to make a square. Each corner should be the juncture of two rolls of net. The remaining three nets (E-G) should be set up next to the original 4 to make another square. Once grazing is complete, move the flock/herd to the new paddock, take down the nets A-C surrounding the old paddock (minus D which makes one of the sides of the new paddock) and set up to make the new grazing location.
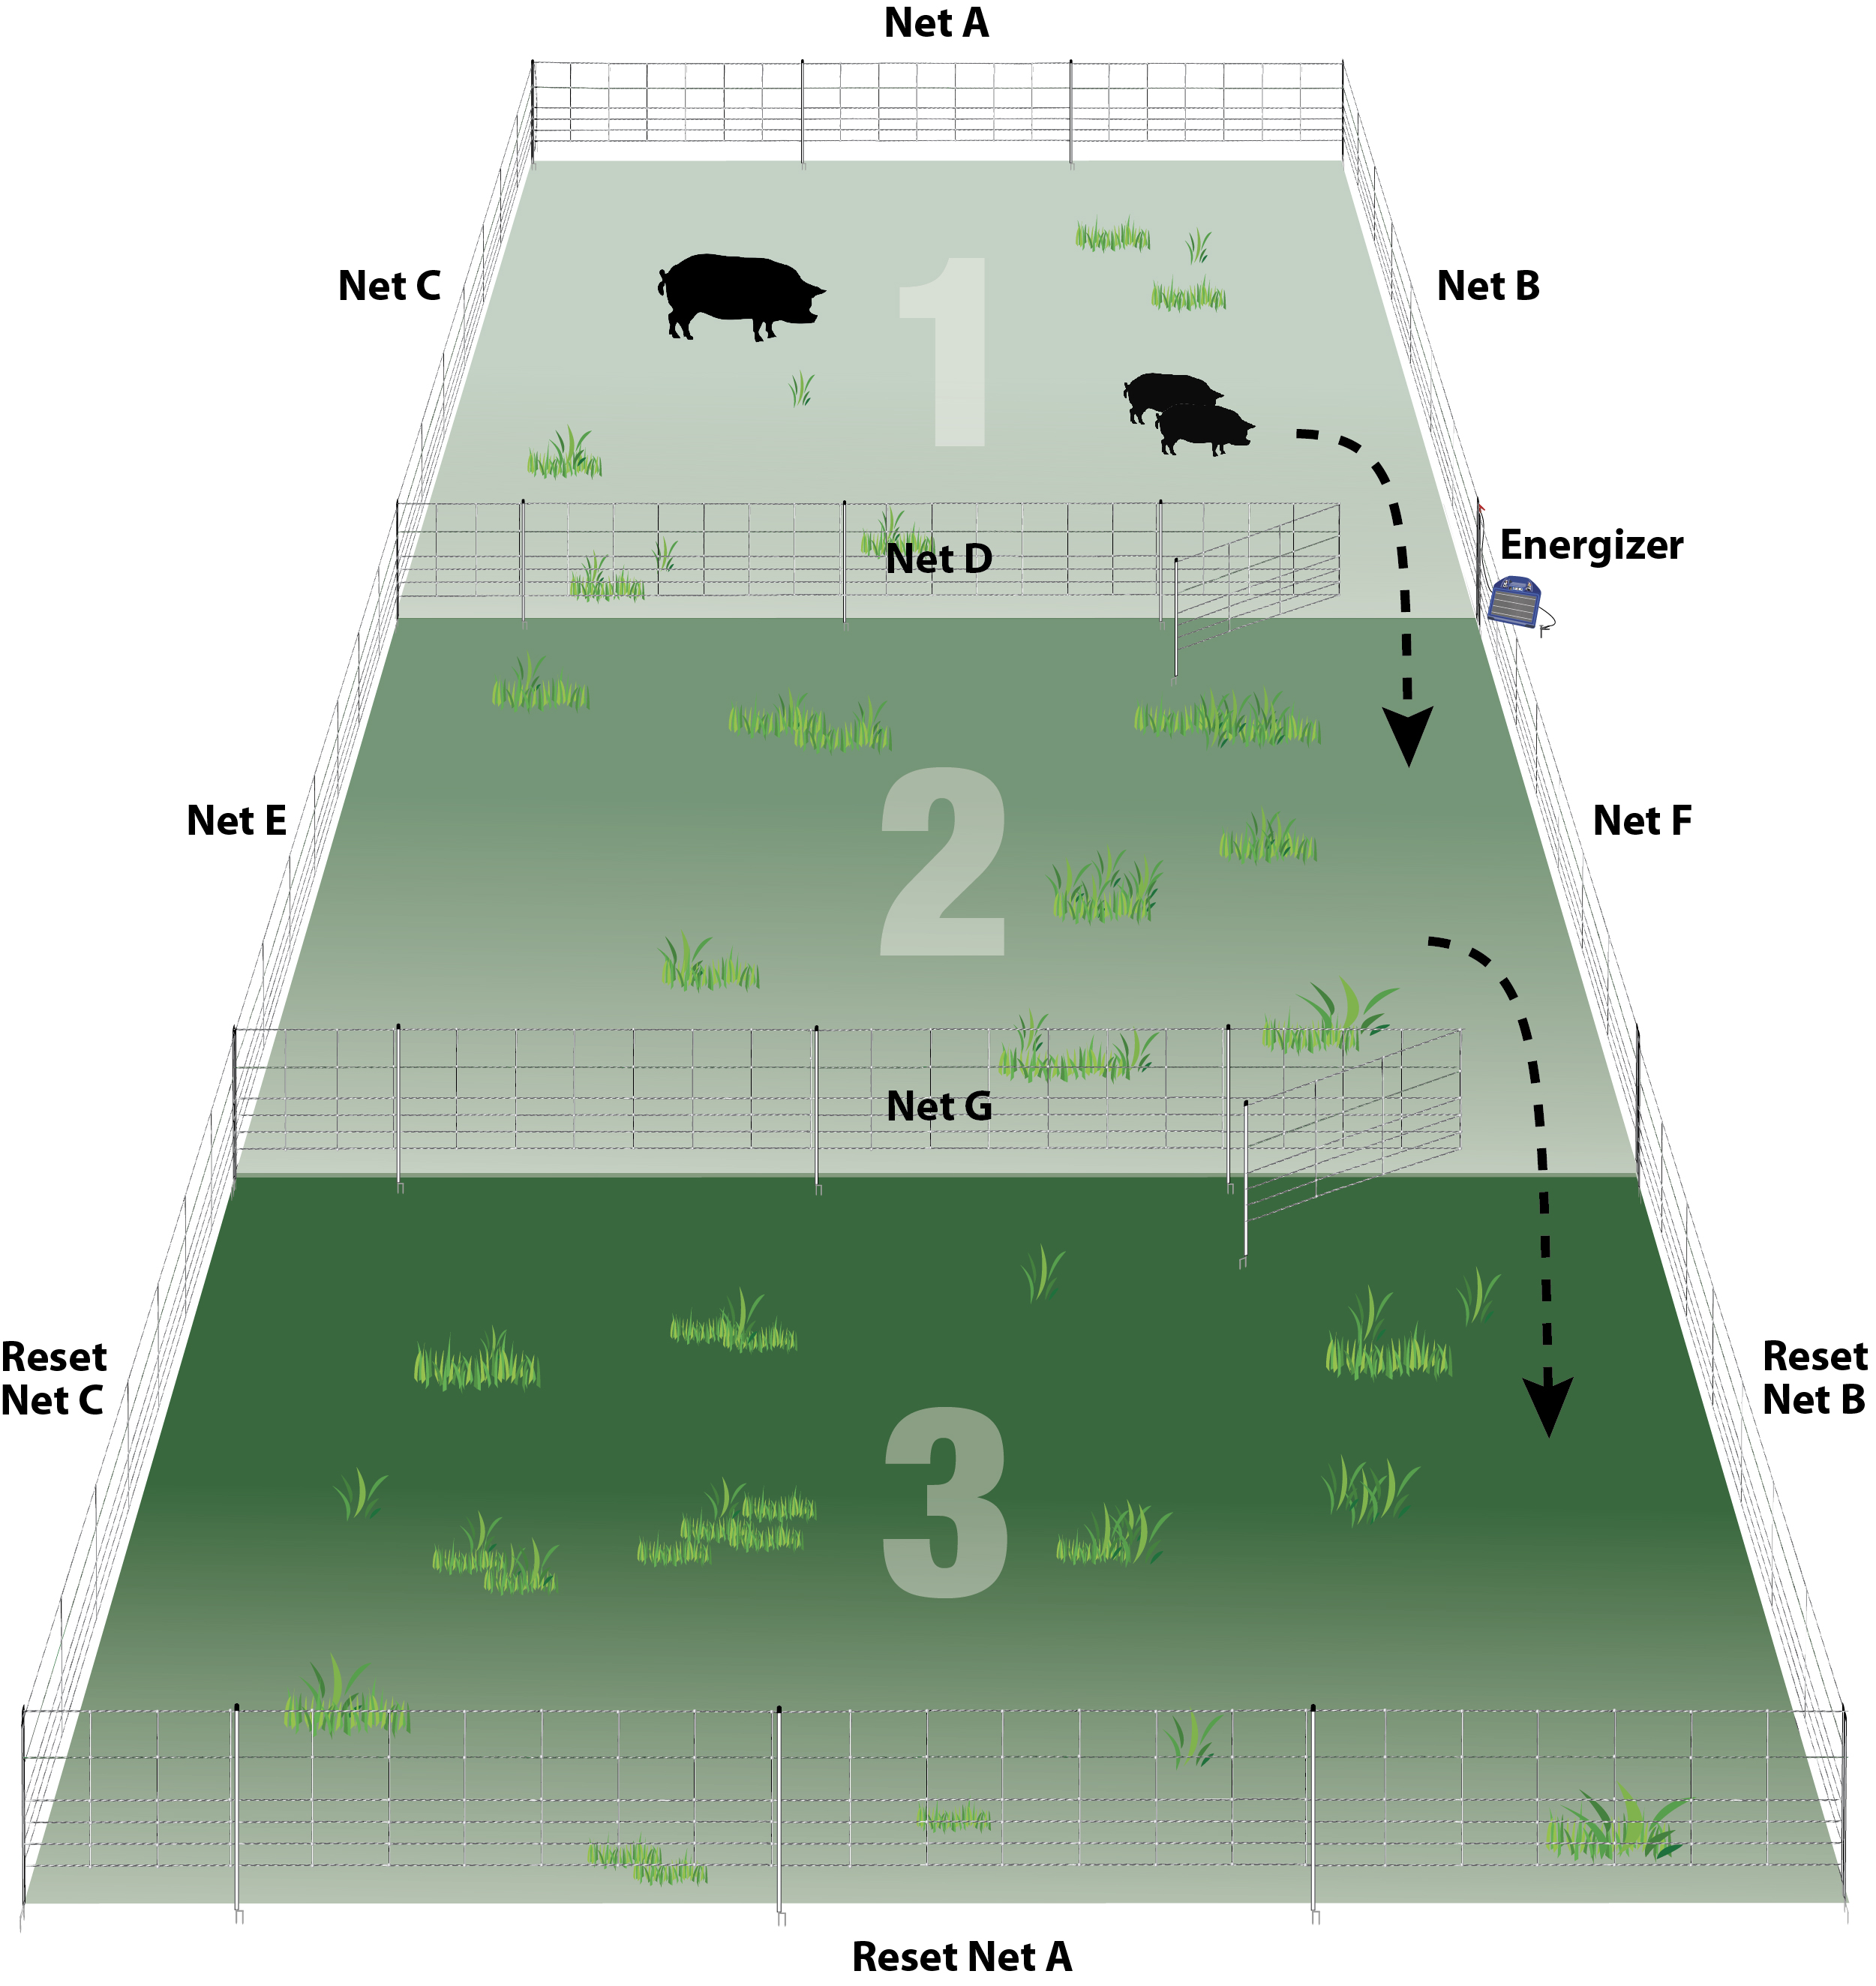 When using four 164’ nets, the square footage of each paddock will be 26,896′, or roughly 0.6 acres. The benefit of this system is not only its size, but there is an opportunity to move stock in different directions through each net connection.
Wedges: Great on paper but…
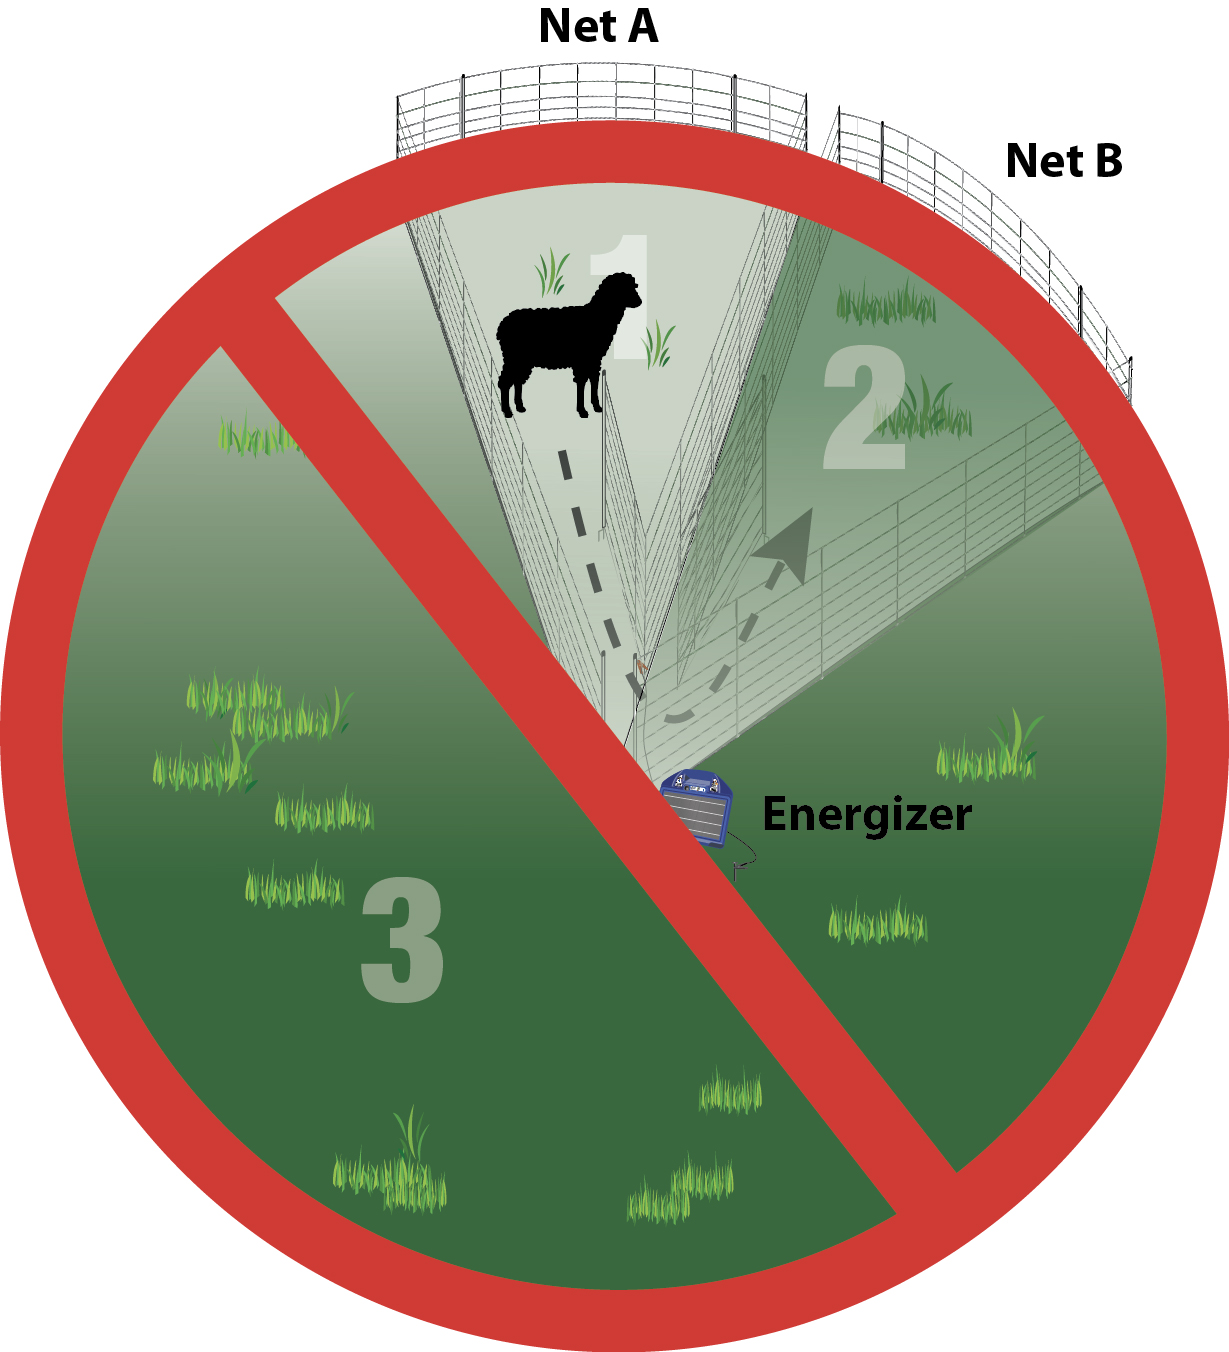
This splits the pasture into wedges and allows the user to rotate nets A and B around the energizer, similar to the first option. If using a 164′ net, the fence line would measure (roughly) 60’x40’x60′ for 1,200′ square feet of grazing per wedge, or 11,300 square feet for the whole circle. This makes 9-1/2 wedges. Though this offers more square footage of grazing, livestock will not graze the area near the center because it’s too constrictive. Because of this, we do not recommend wedge grazing.
