Fence & Battery Digital Tester
Product Details
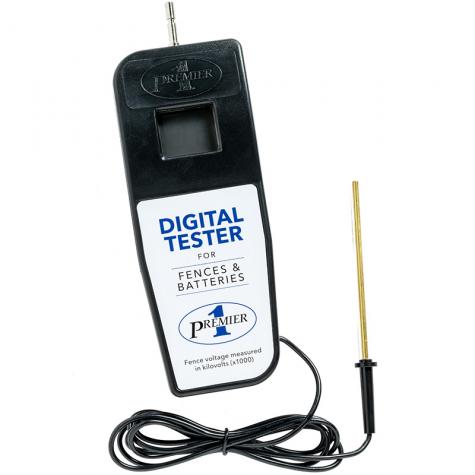
All-in-one digital fence tester checks the voltage of energizers, fences and 12V batteries. Simplify electric fence troubleshooting with one device!
Traditional fence voltmeters only determine fence voltage (in thousands), but they can’t read a battery’s lower voltages. Multimeters can test batteries and solar panels, but are damaged when testing the high voltages of electric fence.
Premier’s Fence & Battery Digital Tester measures both high and low voltages with a single, budget-friendly tool.
All-in-one Features:
- Check energizer output, fence performance, and battery capacity
- Measures volts (V) and kilovolts (kV)
- Digital display removes the guesswork of light-up testers
- Lightweight and easy to use
Instructions/Diagrams:
Specs
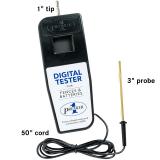
- Dimensions: 4-3/4"L x 3"W
- Metal fence tip is 1"L
- Metal ground probe is 3"L with a 4' cord
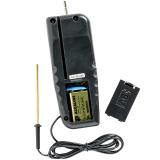
- Requires (1) 9V battery, included
- HI means either the fence voltage is over 13,000V (13kV) or the battery voltage over 18V. Lo means, the internal 9V battery is flat.
How To Use
To test the energizer:
The output voltage of an electric fence energizer should be at least 5000V. If the voltage is below 5000V, then the energizer may have a problem. If the voltage is above 5000V, then the trouble lies with your fence.- Turn off energizer
- Disconnect ground and fence leads from the energizer
- Turn on energizer
- Touch ground probe to energizer’s ground terminal
- Touch the tester’s metal tip to energizer’s fence terminal
- Digital display shows voltage in kilovolts (e.g. 5.0 = 5000V)
To test the fence:
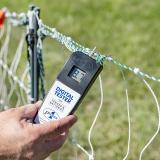
Check the voltage to ensure the fence is properly electrified before introducing animals. Confirm voltage is at least 3000V at the end of the fence line.- Insert corded probe into the soil
- Touch the tester’s metal tip to an energized fence strand
- Digital display shows voltage in kilovolts (e.g. 3.0 = 3000V)
- Pull meter away from fence, then remove the probe from the soil (when pulling, use the probe handle, not the cord, to prevent damage to the wire)
To test a battery:
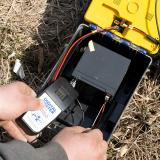
The voltage of a fully charged 12V battery is not lower than 12.6 volts. A 40% charge will read 12.2 volts. Recharge the battery if the voltage is below 12.2 volts.- Disconnect battery from energizer, solar panel or charging station
- Touch the ground probe to the negative terminal of the battery
- Touch the tester’s metal tip to the positive terminal of the battery
- Digital display shows voltage in volts (e.g. 12.7 = 12.7 volts)
Battery replacement:
Battery must be installed before initial use. If the unit flashes an 'error' code during testing or shows no measurement when testing an active energizer (flashing or clicking is evident), replace the battery.- Remove screws holding back cover to unit
- Remove old 9V battery (if applicable) and attach new battery
- Replace cover
-
Energizer Solar Panels and Accessories
Smart Satellite
Item #131200 -Monitor electric fence voltage from any location in real-time. NO subscription fees! Compatible with Apple and Android smartphones.
$191.00 -
Fence Connectors and Accessories
Litzclip® Vertical Strut Repair Set, (2) 2-way, (2) 3-way & (2) 4-way (pkg of 6)
Item #200015 -Quickly repair broken electric fences with Litzclip® for vertical struts. Plastic and stainless steel connectors hold net securely. No tools required.
$10.50 -
Fence Connectors and Accessories
Litzclip® Repair Set, 3mm (4) 2-way, (2) 3-way & (2) 4-way
Item #200008 -Repair electric net fences simply, quickly and securely. No tools required! For electric netting and other 3mm conductors.
$9.75 -
Fence Connectors and Accessories
Litzclip® 2-way, 6mm (package of 5)
Item #200005 -Use stainless steel litzclips for instant connections or repairs to electric fence and other 6mm conductors.
$10.00 -
Fence Connectors and Accessories
Repair Kit for ElectroStop (Standard & Plus), PoultryNet (Standard & Plus)
Item #201710 -A handy repair kit that includes all of the essentials to patch tears and holes in electric net fences.
$2.00 -
Fence Connectors and Accessories
PowerLink™ 4.0, 30" long
Item #335500 -Make instant, in-field connections between electric fences without turning off the energizer. Simple to use and effective.
$5.50
Write a Review
You must be logged in to leave a review. Please sign in.
Elizabeth W from Tennessee
Compact, easy to carry around. Display is fine in sunlight, a concern noted in reviews of many of these devices. Better design than my old Gallagher tester which IMO died before its time from fraying of the probe cord to its the base. (To be fair, “before its time” means 13 years.)
Judah C from Wisconsin
Works great! I bought a second one because I use them so much that if I didn’t have it for one day that would not be a great day.
Steve H from Iowa
This helped me troubleshoot my energizer and fence. A regular fence tester can’t check your energizer and your batteries.
David B from Massachusetts
Premier 1 needs to do something about these testers. I've owned 3 of these and, unlike all the other products we've used or purchased, they just don't last very long. The latest one (purchased March 2023) only lasted one season until the ground probe pulled off. Premier would NOT replace the unit as I was 3 months over the 12 month manufacturer warranty.
Pros:
- When they DO work, they work great. We have (3) chargers running at any one time, (2) of which run on batteries. It's very helpful to have a single device that tests fences, batteries, and chargers.
- The digital readout is superior to the cheaper light-up models.
- Not a durable connection for ground probe. (No way to attach picture of my failed one). This should be redesigned to be like the Zareba A5LVT-Z.
- We store the tester in one of the waterproof charger cases that moves with the fence/animals. Sitting near the charger turns the tester on and thus wastes battery. Another reviewed suggested an on/off switch.
- Not water resistant (not that it claims to be).
David H from Iowa
Replaces three tools. Can test fence line. Can test to see if battery is any good. Can test if charger itself is any good. After first purchase, I bought two more to have at different locations. Lastly, digital readout will show up in bright sunlight. No more squinting to see some tiny lights.


