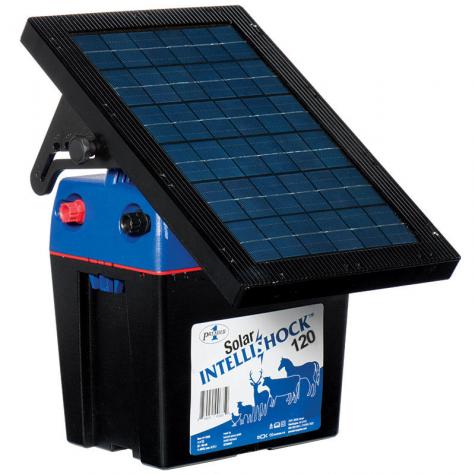
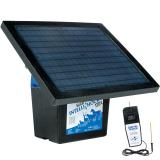
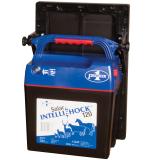
Solar IntelliShock® 120 Energizer & Kit
High-output solar powered 1.2 joule energizer. Portable all-in-one unit arrives ready to power electric fence or netting.
IntelliShock® electric fence chargers are able to reduce energy demand when the fence’s voltage is high–due to fewer weeds touching the fence. This occurs in fall and winter for most fences and occurs all year for some horse, cattle and deer fences. As a result, an IntelliShock unit’s battery is more likely to remain charged through the low sunlight days of autumn and winter.
Replacement parts for the 120 and 120X, including PCBs and transformers, remain available. —Premier
Instructions/Diagrams:
Common Uses
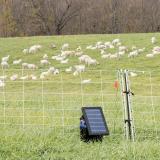
Solar powered energizers are a popular choice when 110V power is not easily accessible. Attached solar panel will recharge the batteries on sunny days.
Benefits
- External 110V adapter port for recharging
- Solar panel is easy to adjust for seasonal light availability
- Easily accessible fence and ground terminals (wiring harness included)
- External 110V port allows the energizer to be operated without a battery and plugged into a 110V power source
- Large capacity batteries for increased life during long periods with low sunlight
- 10 watt solar panel
- On/off light with low battery indicator
- Won’t rust. Made from durable UV-treated polycarbonate
Solar IntelliShock® — Key Differences
| Solar IntelliShock® 30 |
Solar IntelliShock® 60 |
Solar IntelliShock® 120 |
Solar IntelliShock® 180 |
|
|---|---|---|---|---|
| Output Joules | 0.3J | 0.6J | 1.2J | 1.8J |
| Solar Panel | 5 watt | 10 watt | 10 watt | 30 watt |
| Battery (Lead Acid) | 12V 12Ah | 12V 12Ah | (2) 12V 12Ah | 12V 35Ah |
| 12V DC Draw | 15–29 mA | 20–58 mA | 28–104 mA | 24–140 mA |
| Should power…* | 1–2 rolls | 3–5 rolls | 6–10 rolls | 9–15 rolls |
Specs
Includes:
- 1.2 joule fence energizer
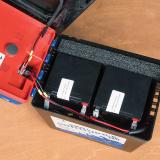
- (2) 12V 12Ah sealed lead acid batteries
- Wiring harness
- IntelliShock 120 includes a tilt-adjustable 10 watt solar panel
- Overcharge regulator
- 110V battery recharger
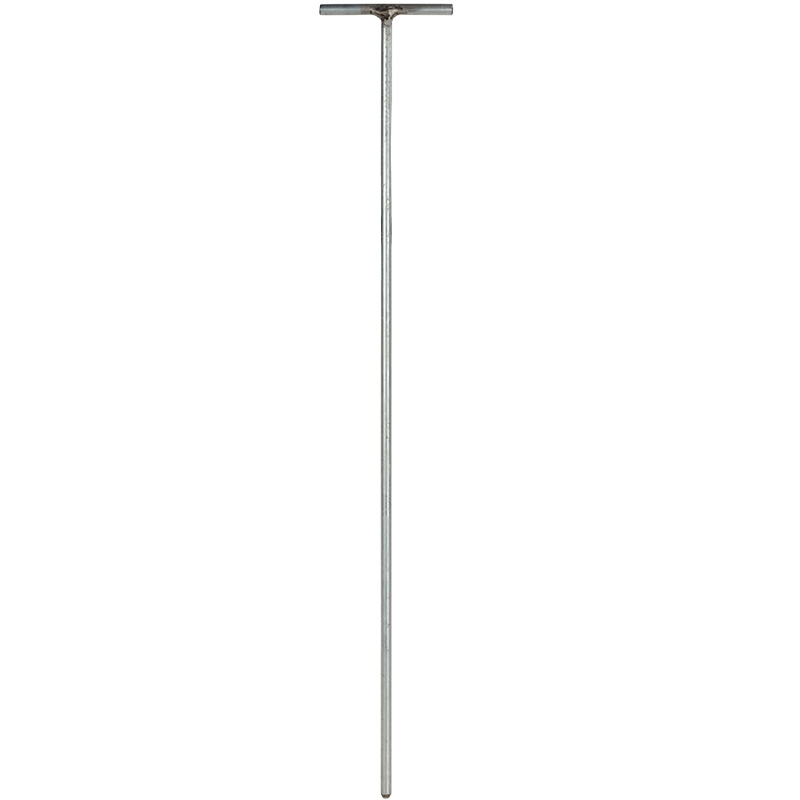
- 18 inch “T” ground rod, galvanized
- UV-treated, polycarbonate case with red handle
Note: Kit includes all of the above and a Fence & Battery Digital Tester.
Joules
- 1.50 stored joules
- 1.20 output joules
Miscellaneous
- Draw from a 12V battery is 28–104 milliampere (mA) per hour, depending on weed load.
- 40 pulses per minute.
- When properly used or stored, the batteries should last 3–4 years. (Assumes maximum 40% draw down on battery.)
Should power...
- 6–10 rolls of electric netting depending on soil conditions and vegetation.
- 2 miles of 3 strand cattle fence.
- 3/4 mile of 5–7 strand sheep fence.
How to Use
Using 10mm wrench, remove the bolts holding the solar panel in place and replace with the supplied knobs (shipped inside the unit).
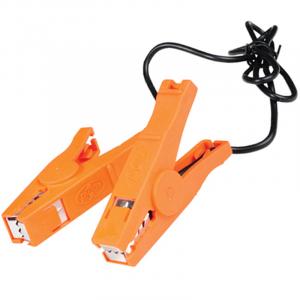
Use the wiring harness to connect the energizer to the ground rod and fence.
- Unscrew the red terminal knob.
- Secure the bare end of the wire with the orange clip into the pre-drilled hole behind the red terminal knob.
- Replace the red terminal knob and tighten.
- Repeat steps #1–3 for the black ground terminal.
- Connect the black clip to the ground rod.
- Connect the orange clip to the fence.
- Turn energizer on. (When switching on, make sure the power button is pressed all the way in.)
- Check the voltage to ensure the fence is properly electrified before introducing animals.
Optimal Solar Orientation and Placement
Correct placement of the energizer and solar panel is critical to the best operation of the unit.
1. Position the energizer so that the solar panel faces due south. This will allow the panel to receive the maximum amount of sunlight possible even during the low-light days of winter. Consider the sun’s movement throughout the day and avoid placing the unit where it may be covered by shadows from trees, bushes or tall grass.
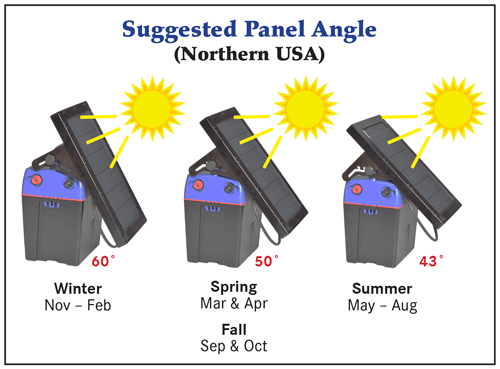
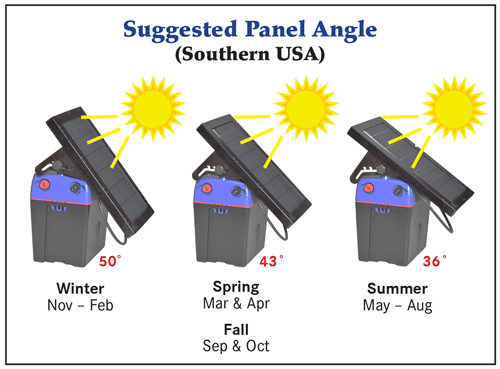
2. Determine the correct tilt angle for the solar panel. The sun’s position above the horizon will change from season to season. As a general recommendation, an angle of 50° is optimal for the longest use in most areas of the continental USA. However, the ability of the solar panel to recharge the battery can be maximized by making angle adjustments each season as shown in the illustrations below.
In the far northern USA from November until February, there may not be enough hours of sunlight to fully recharge the battery. Charge the battery externally when the battery indicator light flashes green/red or red.
3. Regularly remove all debris from the solar panel. This includes grass clippings, dust (especially on gravel roads), leaves and snow as this will reduce the solar panel’s ability to recharge the battery.
Precautions
- Make sure the power is turned off before working on the fence or the energizer.
- Make sure the fence line is clear of grass and debris that may lower the fence’s voltage.
- Ensure the solar panel is facing due south and avoid placing the unit where it may be covered by shadows from trees, bushes or tall grass.
- Regularly remove all debris from the solar panel.
- Batteries that are less than 40% charged may become damaged. Batteries MUST remain fully charged in freezing conditions.
To Reduce Risk & Liability
- Never place your head or upper spine near an electrified wire. Accidental head or neck contact can occur when pushing a voltage probe into the soil. Be careful when doing so to avoid head-to-wire contact!
- Never attempt to step over or climb through an energized fence of any kind.
- Never encourage anyone to touch an electric fence.
Troubleshooting
Start by measuring the voltage at the end of the fence line. If the voltage is below 3000V, follow these steps to determine if the problem is with the fence, or the energizer.
Test the energizer first!
- Turn off the energizer.
- Disconnect the wires going to the fence and ground stake/rod.
- Turn the energizer back on.
- Measure the voltage on the energizer between the two terminals (positive and negative) with a digital voltmeter or other high-voltage tester. Touch one end to “-“ (earth terminal) and the other end to “+” (fence terminal). The reading tells you how well the energizer is working without any other variables.
- If the tester reads below 5000V, then the energizer (or possibly the battery) is the problem. If the voltage is above 5000V, then the trouble lies with your fence.
If the energizer is at fault:
- Test the battery with a low-voltage tester; recharge if lower than 12.2 volts
- Check the grounding system
If the fence is at fault:
- Conductors touching another wire, steel post or the soil
- Broken or damaged insulators
Storage
Tips to preserve battery life:
- Turn off the unit. Disconnecting the unit from the fence is not sufficient, the unit will still pulse unless it is turned off.
- Clean off the solar panel. Dust and debris may have accumulated during use and as a result prevents the panel from maximum electrical production.
- When the energizer is not being used, store the unit indoors at room temperature and out of the sun. Do not let the energizer sit in the sun for an extended period when it is turned OFF as this could damage the battery.
- When not in use, ensure the battery stays above 40% charged. Lead acid batteries don’t work well when they’re left discharged, or at a low charge, for long periods of time. Periodically recharge the battery in the sun or with the included 110V charging adapter. Stop charging when the battery indicator light flashes GREEN. Do not overcharge the battery.
Warranty
30-day warranty for all batteries.
-
Fence Connectors and Accessories
PowerLink™ 4.0, 30" long
Item #335500 -Make instant, in-field connections between electric fences without turning off the energizer. Simple to use and effective.
$5.00 -
Fence Connectors and Accessories
Fence & Battery Digital Tester
Item #200010 -All-in-one fence tester checks the voltage of energizers, fences and 12V batteries. Simplify electric fence troubleshooting with one device!
$24.00 -
Energizer Solar Panels and Accessories
Mounting & Ground Stakes – 16" long, pkg of 2
Item #280150 -Use for mounting SolarStop™ or Solar IntelliShock® energizers off the ground, or as an additional ground rod.
$10.60 -
Fence Connectors and Accessories
T Ground Rod, 3' x 1/2"
Item #151210 -Provide a conductive ground circuit for your electric fence. Conductive t-grip is easy to install and remove.
$15.00 -
Fence Connectors and Accessories
T Ground Rod, 18" x 1/2"
Item #151220 -Provide a conductive ground circuit for your electric fence. Conductive t-grip is easy to install and remove.
$8.00 -
Handling Equipment
Ground Rod and/or Connecting Pin, 3'
Item #151200 -Effectively ground energizers or firmly secure handling equipment. Galvanized pin is resilient to rust and wear.
$8.00 -
Fence Connectors and Accessories
Fence Fault Finder
Item #133500 -Tests electric fences and determine fault locations with the press of the button. Save time in the field and reduce troublesome electrical shorts.
$119.00 -
Fence Connectors and Accessories
Live Fence Indicator
Item #133515 -For instant reassurance that your fence is working. Clip to your fence line and watch for the flash when you pass by. No batteries required.
$45.00 -
Fencing
Warning Sign
Item #346000 -Let passersby know that your fences are electrified with this easy-to-read electric fence warning sign.
$1.60 -
Energizer Solar Panels and Accessories
T-Post Adapter & Ground Rod Mount
Item #114010 -Enables PRS I25/B50/I50 and Solar IntelliShock 30/60/120/180 units to be mounted onto standard T-Posts or T ground rods.
$5.00
-
Fence Connectors and Accessories
Ring Terminal Harness
Item #130800 -Wiring harness fits most electric fence energizers. Alligator clips for attaching to fence (positive) and ground rod (negative). Ring or bare wire ends.
$9.00 -
Fence Connectors and Accessories
Replacement 110V Adapter/Charger (spade connectors)
Item #1132006 -For use with IntelliShock® and HotShock® fence energizers. Recharges depleted batteries or operates the energizer as a 110V unit when near an outlet.
$26.80 -
Fence Connectors and Accessories
Replacement 110V Adapter/Charger (external port)
Item #1132007 -For use with IntelliShock® and HotShock® fence energizers. Recharges depleted batteries or operates the energizer as a 110V unit when near an outlet.
$28.01 -
Fence Connectors and Accessories
Fence & Battery Digital Tester
Item #200010 -All-in-one fence tester checks the voltage of energizers, fences and 12V batteries. Simplify electric fence troubleshooting with one device!
$24.00
Write a Review
You must be logged in to leave a review. Please sign in.
Rebekah K from California
This little unit packs a punch! Love the portablity.
Patrick W from Pennsylvania
Only had a short time, but it packs a punch. FAR FAR better than any solar
charger you'll get at big box store. Cannot speak to longevity, but so far
very satisfied. Large solar cell and easy ability to change out batteries as
needed.
Jeffrey C from North Carolina
love this product but have found a issue in the winter with the power button freezing in the on position due to snow landing on the space left after pushing button in. had to use a knife to chisel the ice away so i could turn unit off. this has happened twice so far this winter both times right after a fresh snowfall.
Ken W from Missouri
This is an excellent fence energizer. Fairly easy to understand and setup. Utilized it with over 500 feet of electroshock net fence and have no complaints. Stayed well charged and operational even during a week straight of overcast skies.
April S from Washington
I use this for 800 feet of electronetting for my sheep. It works well, even when there is some grass or other vegetation touching the netting, and even when the soil was extremely dry this summer. So it gets 3 stars for working well under conditions where some energizers fail.
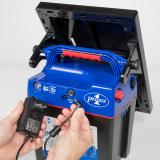
My issue with this energizer is the recharging design. Western WA doesn't get as much sun as most areas of the country, so as summer disappeared the energizer started blinking red/green, indicating that the battery needed to be recharged (which is a nice feature earning another star -- I don't have to guess and risk ruining the battery). I brought it in the house today and opened up the top to plug in the charger. That's when I became disappointed. First, when you open the top the weight of the solar panel (which is attached to the handle, on the top) is now putting pressure/torque on the plastic of the case. It doesn't detach easily or lay flat -- it just hangs there. Life experience tells me that something there will eventually break, and common sense has me propping the solar panel up while the battery case is open. Nothing in the instructions recommends that. Second, there is no hole to simply plug in the charger like there is for almost every other rechargeable device in the world. You have to remove the two solar panel wires and replace that connection with the two charger wires. That wouldn't be such a big deal except that the connectors are recessed deep inside a somewhat narrow hole in the top of the plastic case, and they fit really tightly over a delicate circuit board component. Removing them took needle nose pliers, and 4 different attempts by 2 different people, each attempt gripping and pulling harder and harder, worried that we might be doing it wrong and possibly break it. Eventually the connectors were pulled hard enough that they released, and hopefully no harm done. This absolutely could not have been done without needle nose pliers, which is not mentioned in the instructions. Attaching the charger connectors was also difficult, as the wire end within the connector moves around a bit, and the connectors have to be threaded over a circuit board projection that appears somewhat delicate, and is recessed down in the hole in the plastic case. Hopefully, the wire is oriented properly within the plastic connector as I attached it. Third, now (I think) I've gotten the charger wires plugged in and have plugged my charger into the wall. A green light came on at the charger. A red light is supposed to come on when the charging is finished. However, there is nothing on the energizer itself that indicates that charging is in progress. What if I don't have the wires connected properly? I don't have any way to know if the charging is working, other than to wait until the charger light turns red, or assume failure after 8-12-24 (?) hours and get back into the recessed hole and try to make adjustments.
I have little doubt that as the years go by something will eventually break during the recharging process, as there's lots of stuff that could go wrong here. It wouldn't take major design changes to fix these. Make the solar panel easier to remove, requiring no tools, so that pressure/torque is not put on the hinge and plastic box when the top is opened. Make the connectors where the solar panel and the charger are exchanged along the length of the solar panel wire itself, instead of recessed deep inside a plastic tunnel where fumbling people using tools could damage something. Simple in-wire slip connections could solve this problem. And then state exactly what has to be done in the directions, both in the overall owner's manual, and on a charger box (because we all know that few people pull out the owner's manual just to recharge something).
1) You can simply detach the battery leads and use the included power adapter to recharge the batteries directly. The upside of this approach is that you don’t have to fiddle with changing the connections to the solar panel. The downside is that you can recharge only one battery at a time and there is no indicator light to tell you it’s working. If you choose this route, don’t overcharge the battery (limit your recharge to a 24 hour period).
2) Or, as described in the review, you can swap the cables from the solar panel with the cables from the power adapter. The upside is that you can recharge both batteries at once without risk of overcharging. But perhaps a greater benefit is that this method converts the solar battery energizer into a “mains” energizer, in that it can power a fence directly from AC power. In this way the Solar IntelliShock can be used as EITHER a portable solar unit (DC), or one that is plugged-into AC power.
After recharging your batteries, check them with a Battery Charge Meter or a Multimeter. A fully charged 12V battery should measure between 13.1V and 13.4V.
Regardless of which option is used to recharge the batteries, this customer is right. It’s not very clear from the printed User Guide what to do. We’ll work to correct this omission on the next printing.


